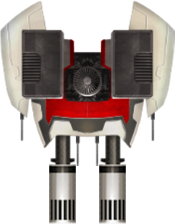
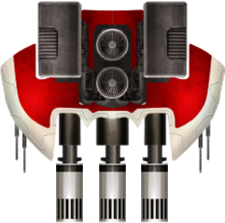
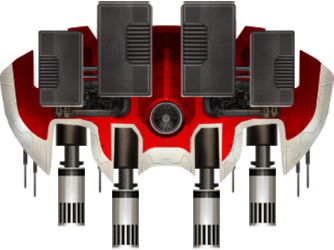
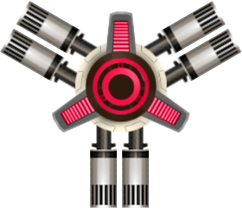
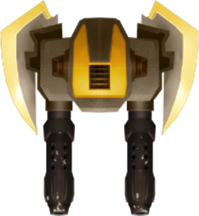
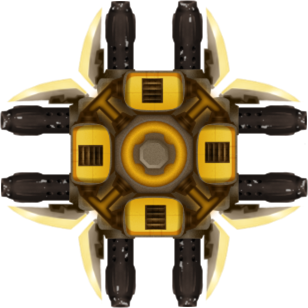
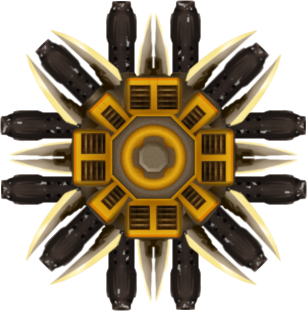
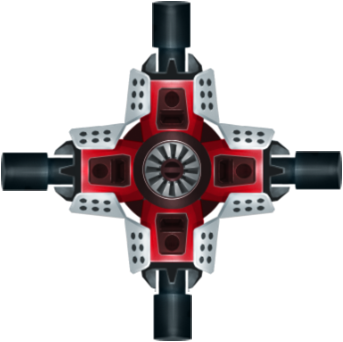
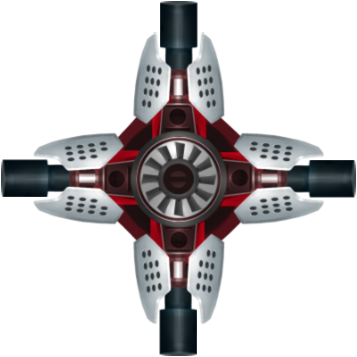
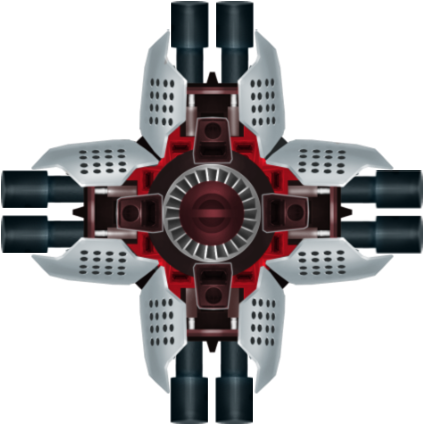
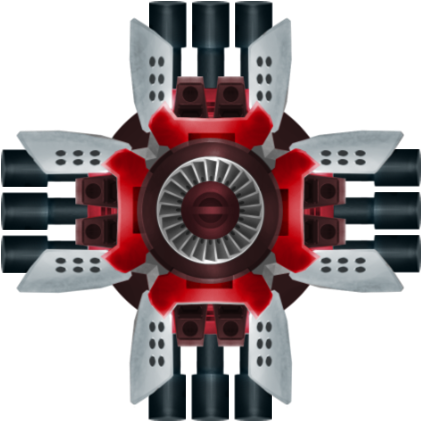
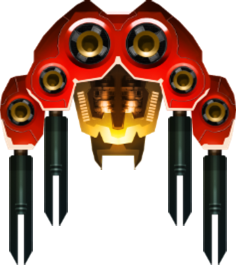
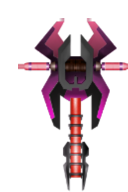
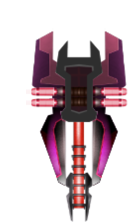
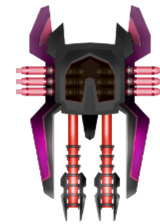
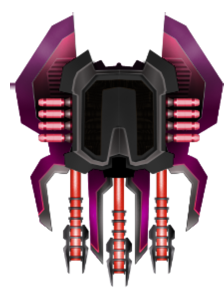
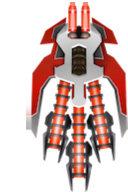
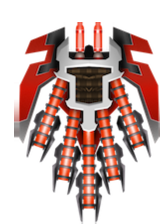
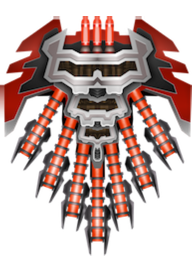
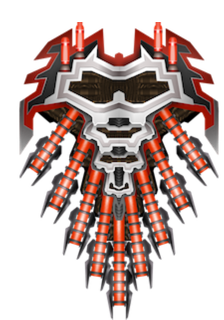
Invader Turrets
Phoenix II —FAQ (IOS)

BOOKMARK
FAQ (IOS) by light_rock_zz
Version: 5.3 | Updated: 07/29/2025
FAQ of the Month Winner: January 2020 | Highest Rated Guide
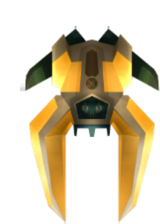
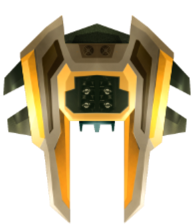
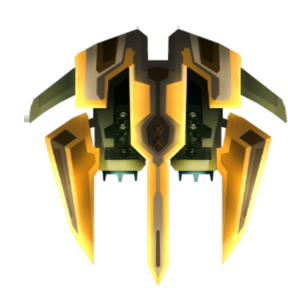
Invaders
Invader Turrets
| Dealing with Invader Turrets | ||||
|---|---|---|---|---|
| List of Invader Turrets | Effective Health of Invader Turrets | |||
| Ship Tier List for Turret Popping | Order of Elimination | |||
- You will die when your ship core comes into contact with an Invader's turret circular hitbox for at least a short period of time.
- This means you can quickly swipe your ship core over a turret's hitbox without dying, provided you do it fast enough.
- Your ship actually has an invisible health, and this health is depleted as your core goes over the turrets' hitboxes.
- Note that you do NOT re-generate health throughout the entirety of one run.
- This explains the slight inconsistencies on how long you can stay on top of a turret.
- Despite having an invisible health, bullets and lasers do enough damage to kill you the instance you touch their hitboxes / laser lines.
- Different turrets have different size of hitboxes.
- Turret health differs from Invader to Invader (which includes different affinities as well).
- All turrets on the same Invader will have the same health.
- The turret type does NOT change the turret health.
- A turret's circular hitbox is different based on the mount point the turret is at.
- It is not affected by the turret type.
- This also means, on one single Invader, the turret hitbox can be different for turrets at different mount points.
- Both turret health and hitboxes are meticulously handset by the devs (confirmed by the devs themselves).
- Invaders will self-destruct 5s after all its turrets are destroyed even if left alone.
There is a distance where bullets continue to exist even as they exit your screen.
- This means offscreen bullets can deal damage to barriers.
- This information is particularly relevant to boomerangs
 , as some boomerangs will re-enter the screen, while others simply disappear.
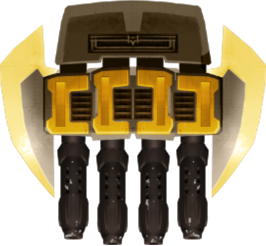
List of Invader Turrets
Do please familiarize yourself with the different tiers of turrets in the table below as they will be used frequently.
Take note that the reload time for every turret differs from Invader to Invader and wave to wave. The reload time is what makes up the different invisible Marks of turrets, which are currently not well known. Other variable factors for the different turrets will be mentioned in the table below.
Static Turrets
These turrets can only be equipped on Sparrows ![]() , or equipped as the middle turret of Herons
, or equipped as the middle turret of Herons ![]() .
.
| Turret | Tier 1 | Tier 2 | Tier 3 | Tier 4 | ||||||||||||||
|---|---|---|---|---|---|---|---|---|---|---|---|---|---|---|---|---|---|---|
Pellet Launchers / Spreads (Daily Missions) |
|
- 5 tightly packed Pellets in a horizontal row per burst (Gaps between pellets are not observable) |
- 3 tightly packed Pellets in a 7-way spread per burst (Gaps between pellets are not observable) |
- 5 tightly packed Pellets in a 9-way spread per burst (Gaps between pellets are not observable) | ||||||||||||||
Pellet Launchers / Spreads (Community Missions) |
- Single Shot |
- Double Shot |
- 5-way spread |
- 9-way spread | ||||||||||||||
Pellet Spinners (Lane) |
|
- 35 Pellet Lanes |
- 50 Pellet Lanes |
- 72 Pellet Lanes | ||||||||||||||
Pellet Spinners (Spiral) |
|
- Number of spirals may vary per burst |
- 10 groups of 16 bullets per spiral |
- 10 groups of 40 bullets per spiral | ||||||||||||||
Dart Launchers / Spreads |
|
- 2 side-by-side lanes × 3 darts per burst |
- 5 lane spread × 3 darts per burst |
- 7 lane spread × 5 darts per burst | ||||||||||||||
Dart Spinners |
- 8 Dart Lanes |
- 10 Dart Lanes |
- 24 Dart Lanes |
- 40 Dart Lanes | ||||||||||||||
Shuriken Launchers |
|
- 2 side-by-side lanes × 5 shurikens per burst |
- Long and Sustained Double Shots |
- Long and Sustained Quadruple (×4) Shots | ||||||||||||||
Shuriken Wave Launchers |
- Single Lane Firing |
- 1-by-1 Wave / Lane Firing (Right side, in your perspective, fires first, then a 0.5s pause, then the Left side) |
- Set(s) of 6 waves of 5 shurikens, each arc horizontally spaced apart |
- 3 sets of 2 waves of 7 shurikens which spread in opposite directions (one from left to right, the other from right to left, which ultimately forms a chevron) which intercross with each other. | ||||||||||||||
Shuriken Spinners |
|
- 8 arcs per burst |
- 8 arcs per burst |
- 6 slow passes of shurikens in a zig-zag pattern | ||||||||||||||
Boomerangs |
- Single Lane Firing |
- 1 stream of boomerangs from both left and right sides |
- 2 streams of boomerangs from both left and right sides |
- 4 streams of boomerangs from both left and right sides | ||||||||||||||
(Pellet / Laser) MIRV Launchers / Spreads |
- 1 MIRV fired per burst |
- 2 MIRVs fired per burst if pellet MIRVs |
- 4 MIRVs fired per burst if pellet MIRVs |
- 6 MIRVs fired per burst if pellet MIRVs | ||||||||||||||
(Pellet / Laser) MIRV Bloomers |
|
- 12 MIRVs per burst if pellet MIRVs |
- 20 MIRVs per burst if pellet MIRVs |
- 30 MIRVs per burst if pellet MIRVs | ||||||||||||||
Tracking Lasers |
- Single straight laser |
- Single straight laser |
- 2 parallel straight lasers |
- 3 parallel straight lasers | ||||||||||||||
Speed Lasers |
- Single straight laser |
- Single straight laser |
- 2 parallel straight lasers |
- 3 parallel straight lasers | ||||||||||||||
Cone Lasers |
- 3-way laser spread |
- 5-way laser spread |
- 7-way laser spread |
- 9-way laser spread | ||||||||||||||
Doomsday Laser |
- Gigantic Nightfury wide laser, with a width of 100 | |||||||||||||||||
Doomsday Bomb |
- Kills you if within your ship's core is within a radius of 300 without invincibility activated (using the center of the generated ball of red energy as the epicenter) | |||||||||||||||||
Doomsday Super MIRV |
- Forward firing (No tracking) | |||||||||||||||||
Caged MIRVs |
- Only activates after corresponding Sparrow is destroyed | |||||||||||||||||
Empty Turret Slot |
- Not possible unless damage is dealt to the turret previously occupying the space | |||||||||||||||||

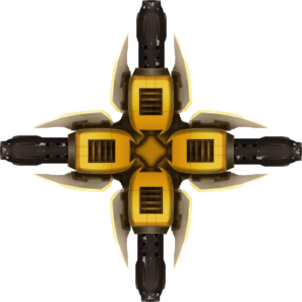


Effective Health of Invader Turrets
- All turrets on the same Invader have the same health.
- Note that Sparrow
 Turret Health are not listed because it's not possible to destroy a Sparrow's turret without destroying the Sparrow itself.
 - Turrets can only be damaged through inflicting damage on the body of Invaders (specifically, on the turret hitbox, and definitely not an Invader's cockpit).
- This means that Invader shields (if any) need to be downed before damaging turrets. As Shield Breaker
 weapons deal normal damage to Invaders with their shield downed, there is no advantage from Shield Breaker weapons to turrets.
 - Armor damage reduction applies to turrets on Armored
 Invaders if you are NOT using an Armor Piercing
  weapon..
 - Note that for Herons
 and Eagles
  , even though it looks like their middle turrets are on their cockpits, they do not take damage if you deal damage to their cockpits. This means you cannot deal critical hit damage to turrets of Armored Invaders.
- This means that Invader shields (if any) need to be downed before damaging turrets. As Shield Breaker
- A red colored number mean that the respective turret health is lowered because of a High Impact
 weapon.
 - An amber colored number mean the respective turret health is maintained instead of increased because of using an Armor Piercing weapon.
- A number in italics, bold & underlined means that the respective turret health is increased because of armor damage reduction.
| Invader | Weapon Affinity | |||||||||||
|---|---|---|---|---|---|---|---|---|---|---|---|---|
| None (Aura | High Impact | Shield Breaker | Armor Piercing | |||||||||
| Invader Affinity | ||||||||||||
| Unprotected | Shielded | Armored | Unprotected | Shielded | Armored | Unprotected | Shielded | Armored | Unprotected | Shielded | Armored | |
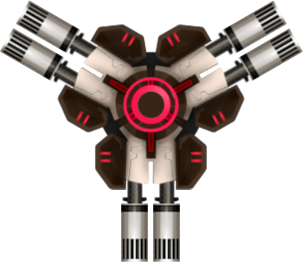
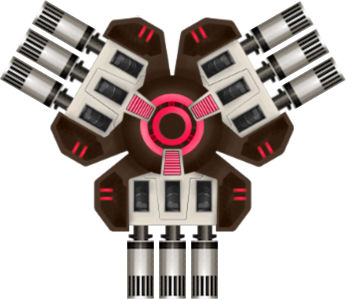
| Raven | 8.1 | 5.4 | 10.29 | 7.2 | 4.8 | 10.29 | 8.1 | 5.4 | 10.29 | 8.1 | 5.4 | 7.2 |
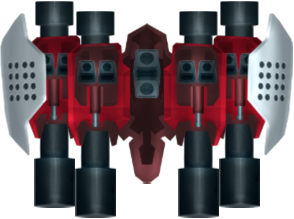
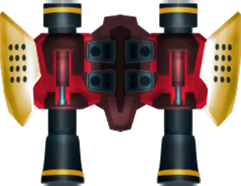
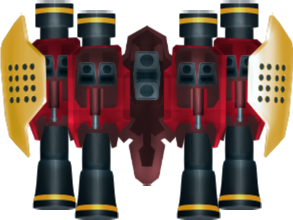
| Heron | 12.6 | 8.4 | 16 | 11.2 | 7.47 | 16 | 12.6 | 8.4 | 16 | 12.6 | 8.4 | 11.2 |
| Eagle | 22 | 14.6 | 28.29 | 19.56 | 12.98 | 28.29 | 22 | 14.6 | 28.29 | 22 | 14.6 | 19.8 |
| Vulture | 40.5 | 27 | 52.07 | 36 | 24 | 52.07 | 40.5 | 27 | 52.07 | 40.5 | 27 | 36.45 |
| Condor | 45 | 30 | 57.86 | 40 | 26.67 | 57.86 | 45 | 30 | 57.86 | 45 | 30 | 40.5 |
| Roc | 48.6 | 32.4 | 62.49 | 43.2 | 28.8 | 62.49 | 48.6 | 32.4 | 62.49 | 48.6 | 32.4 | 43.74 |
Tier List for Turret Popping
Popping Normal (Exposed) Turrets
Different ships have different turret popping capabilities. This section will group ships into different tiers of turret popping.
We shall consider 5 different tiers of turret popping capabilities for different ships, with regards to normal turret popping.
The tiers are described as follows:
Tier 1 - Turret popping is very easy for these ships, and there is absolutely no issue to specifically aim for the turrets you want to pop off.
Tier 2 - Turret popping is easy for these ships, and is highly recommended for these ships. However, they may be a bit harder to pull off than Tier 1 ships, because their main weapon
takes longer to do so, or the defensive means to keep them aligned to the turrets you want to pop off is not the most optimal.
Tier 3 - Their main weapons
in terms of offence) to keep them adequately aligned to the turrets you want to pop off.
Tier 4 - Their main weapon
Tier 5 - Very difficult main weapons
| Tier 1 | Tier 2 | Tier 3 | Tier 4 | Tier 5 |
|---|---|---|---|---|
| Krillou | Veil | Tar'Cah | Shinova | Jericho |
| Trinity | Jericho Alpha | Razor VI | Fujin | Elyon |
| X-81 | Phoenix | Wrackr Alpha | Wrackr* | Ogon |
| Icarus | Buhloo | Tillat'Or | Juggernaut | Hunter |
| Nimbus | Havoc | Ex04239 | Atlas | Yigothu |
| Baqlor | Essin | Torrent | ||
| Wraith | Vani-Vith | Zephyr | Sonah | |
| Predator | 502-Q8 | Dragonfly | Shogun | |
| Lyova | Gladius | Barret | Xavis | |
| Luna | Saber | Proteus | ||
| Valkyrie | Njörun | |||
| Exarch | Boxer | |||
| Sonah Alpha | Polaris | |||
| Antioch | Neni | |||
| NC-271 | Starless | |||
| Mirage | Kibarrax | |||
| Qhelqod | ||||
| Zhetass |
*Wrackr is inbetween Tier 4 and 5, sort of a Tier 4.5, but once again it's the only one.
- While it's similar to Atlas and Essin due to its rapid firing nature, the main weapon's spread makes it pretty difficult to do turret popping.
- While it does have Point Defence
 to aid positioning, the weapon spread requires it to be close enough to actually do meaningful turret popping, which is really difficult especially against spread turrets, or spinner turrets after they start firing.
Popping Difficult-to-reach Turrets
Some ships possess much easier means to allow them to pop turrets on the back row of Rocs ![]() , or the 2 central turrets of a Condor
, or the 2 central turrets of a Condor ![]() . These turrets are difficult to reach, which makes it different from normal turrets which are easily exposed to damage. In a later sub-section, we will consider turret popping strategies for ships that can do this reliably, and also strategies which accommodate to ships cannot do this with enough reliability.
. These turrets are difficult to reach, which makes it different from normal turrets which are easily exposed to damage. In a later sub-section, we will consider turret popping strategies for ships that can do this reliably, and also strategies which accommodate to ships cannot do this with enough reliability.
We shall consider 4 different tiers of turret popping capability for these difficult-to-reach turrets.
Tier 1 - Very reliable and easy enough to pull off
Krillou - Firing the initial Stun EMP
to completely stun the Invader allows it to get behind and make quick work of these turrets. You will likely be able to pull off 2 Stun EMPs, the second one usually almost full so that you can go about popping off all of them. Its Photon Bombs are reliable enough to get the job done with ease.
Dragonfly - Ion Cannon
allows it to get behind to pop these turrets slowly with the Twin Miniguns. It'll take some time but a healthy stockpile of Ion Cannons will do the job very well. Take note that this will be harder with a Condor
since there are usually a lot of Invaders around as well. However, you can work to at least take out whatever is front of the Condor first.
Barret - Similar to Dragonfly, this ship will pop these turrets easily. It'll take some time but a healthy stockpile of Ion Cannons
Sonah Alpha - The upgraded capabilities of its Firestorm allows it to simply mass pop off turrets, whether is it the front row turrets or back row turrets. Simply slowly go from one side to the other as turrets get popped off, throwing in Ion Cannons
Trinity - Teleporting
behind to pop these turrets after the Condor
arrives will work very well. After you get behind, deploy Chrono Field
to then run right on top of these turrets to take them out. A full size Chrono Field is enough to pop off 2 turrets.
NC-271 - Similar to Dragonfly, this ship will pop these turrets. It takes 1 or 2 burst of the Plasma Cluster before the shield goes down. Aiming is straightforward. Highly reliable with a reasonable stockpile of Ion Cannons
Polaris - Similar to Dragonfly, this ship will pop these turrets. The aiming is straightforward since you just have to stand just in front of the turret. Highly reliable with a reasonable stockpile of Ion Cannons
Lyova - The thin Photon Shredder will pass very reliably between the front row turrets. It's double defensive options will also ensure positioning is perfect. However, it will take 2 bursts of the Photon Shredder to take out one such turret.
Nimbus - It's near impossible to get Nimbus to fire directly at these turrets, but you can trick Nimbus into locking on to a front row turret and then quickly shifting yourself such that it hits these turrets instead. Some of the damage will be absorbed by the front row turrets. If you are lucky, a critical hit will mean both turrets, the front and back turrets will be gone. Stun EMP
Tier 2 - Reliable enough, but it might require a bit more precision and/or skill to pull off
Jericho Alpha - The upgraded Inferno Seekers automatically does their job to pop off turrets, similar to Sonah Alpha. However, the process will be slower due to the curvy nature of these missiles which sometimes hit the Invader's body/shield instead.
Photurius - The initial Stun EMP
Prime X - This is a pretty unique case, where it's Missile Swarm
that does the job. Just before the Invader fully arrives, charge up Teleport
Baqlor - While the Serrator Laser looks weak, the angled Serrator Lasers often penetrate deep into the back row turrets and pop them off even without you explicitly aiming for them. Just position yourself on one side of the field and the main weapon takes care of the rest. It does take some time however, but Chrono Field
Predator - The rather thin Dual Blasters allows it to pass between front row turrets and hit back row turrets. A small barrier
also helps to align yourself perfectly. However, more often than not, some of the projectiles on one side hit the body of the Invader instead due to their random movement. It generally takes 2 bursts of the Dual Blasters to pop off such a turret, but a perfect scenario where all the projectiles hit the turret will make that a single burst.
Icarus - The very thin Inferno Laser will pass between the front row turrets and hit the back row turrets. It will take a bit of skill to line it up perfectly between front row turrets. Teleport
Neni & Mistral - Their very thin main weapons
Tier 3 - Difficult to pull off, but still possible. I do not recommend trying unless there are no very difficult turrets.
NC-150 - Stun EMP
Veil - The Fusion Laser is pretty wide, which makes it quite difficult to have its Fusion Laser pass between front row turrets. Otherwise, it's Bullet EMP
will keep it perfectly in line for the task, but you might run out of enough Bullet EMP before the shield goes down to commence such turret popping.
Tar'Cah - The Storm Blaster is thin enough, but it's lack of defenses to keep it in line with these turrets make it quite difficult to pull off
Zhetass - It's Flux Array is pretty wide like Veil, which makes it slightly difficult to pull it off. Phalanx
works pretty decently to get it in position well enough, but you will have to shovel off bullets before you position yourself properly, which can be difficult given it's pretty difficult to accurately predict the time the Flux Array goes off.
All other ships belong to Tier 4, which means that it is either near impossible to do so, or it's not reliable enough at all to explicitly try for it.
Order of Elimination 
Prioritizing what to eliminate is one of the hardest things to teach in this game, and it takes months of experience with the game to fully grasp it. That being said, this guide tries to give you a pretty good guide on how to go about doing this.
- The hardest thing about teaching this aspect is, there is no definite answer.
- Your ship's Aura
 and Zen
  plays a part in the order of elimination as well.
 - It also depends on whether you are just simply looking to survive, or speedrunning.
- If your main weapon is a homing or instant tracking weapon, and you do not have Vorpal Lance or Focus Lance
 , it will be difficult to execute turret elimination.
Invader Turret Approach
Different Invaders have a different approach to them.
- For Sparrows , Ravens
 & Herons , it's simply easier to kill them entirely.
- If you are in desperate survival mode, and you want to successfully be able to charge Mega Laser
 or Mega Bomb
  because you are expecting the next wave to be a tough one, try slowly popping off the turret which is closer to the centerline of the field.
 - If you are skilled enough, you can even pop off both the side turrets of a Heron , which leaves the middle turret, which is trivial to handle.
- Carefully aim your main weapon on the last Invader, then retreat to a safe spot to charge Mega Laser or Mega Bomb .
- This is especially relevant to Shuriken/MIRV missions.
- If you are in desperate survival mode, and you want to successfully be able to charge Mega Laser
- For Eagles , if the middle turret is dangerous, try to pop it off.
- Unfortunately, the problem is that trying to pop off the Eagle's middle turret is very RNG based, as the turret hitbox for Eagles is very difficult to understand, even for veterans.
- Aiming in the dead center of the turret is unlikely to be able to pop the turret off, so try to offset very slightly either to the left or right, whichever is more convenient.
- This is likely because the dead center of the turret is being blocked by the invisible cockpit of an Eagle .
- Unfortunately, the problem is that trying to pop off the Eagle's
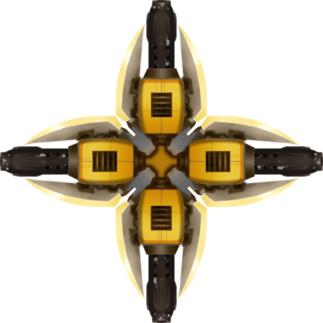
- The real prioritization of turret elimination comes when you are dealing with Vultures
 .
.- All of a Vulture's turrets are exposed so you can choose which ones to pop off first. We will discuss the turrets to eliminate below.
- All of a Vulture's
- For Condors and Rocs , there is an additional layer of complexity as they also have difficult-to-reach turrets.
- These turrets either require you to go point blank with them, or find a way to shoot between other turrets to reach them.
- We will discuss how to deal with both exposed and difficult-to-reach turrets, as exposed turrets can often affect how you eliminate difficult-to-reach turrets.
This guide assumes perfect reachability of all turrets.
- That means no matter where the turret is, you are able to pop it off somehow.
- This scenario occurs exclusively with the ship Trinity, because Teleport allows you to be wherever you want to be, and Chrono Field's invincibility allows you to be able to stay there long enough to pop the turret off.
- Because the scenario will almost never be perfect, strike off turrets you cannot reach and go down the list.
Dealing with Difficult-to-reach Condor & Roc turrets
We will first discuss the best technique to deal against Rocs ![]() and Condors
and Condors ![]() , as these 2 Invaders are the most threatening. Generally, difficult-to-reach turrets are the most dangerous turrets and thus, usually the first priority to pop off. This will be much more difficult to apply to Shielded
, as these 2 Invaders are the most threatening. Generally, difficult-to-reach turrets are the most dangerous turrets and thus, usually the first priority to pop off. This will be much more difficult to apply to Shielded ![]() Condors
Condors ![]() and Rocs
and Rocs ![]() , although ships that have Stun EMP
, although ships that have Stun EMP ![]() and Ion Cannon
and Ion Cannon ![]() may be able to pull this off.
may be able to pull this off.
We will class the turrets into 6 different classes. This will be relevant for our discussion:
- Dart Launchers/Spreads - We shall refer to them as Fast Trackers.
- Boomerangs , Shuriken Wave Launchers, Shuriken Launchers, Tracking Lasers
 & Speed Lasers - We shall refer to them as Slow Trackers.
 - Pellet Launchers/Spreads & Pellet MIRV
 Launchers/Spreads - We shall refer to them as Forward Turrets.
 - T1/T2/(T3) Pellet Spinners (Lane / spiral), T1/T2/(T3) Dart Spinners, T1/T2/T3 Shuriken Spinners - We shall refer to them as Spinners. Note that T3 Pellet & Dart Spinners may sometimes be deadly, so re-class them into High Priority Turrets if needed.
- T3/T4 Pellet MIRV Launchers, T3/T4 Pellet MIRV Bloomers, T4 Pellet Spinners (Spiral) & Doomsday Super MIRVs
 - We shall refer to them as Urgent Priority Turrets. These turrets are classified as such because they fire off their first burst quickly and reload quickly.
- If there is only ONE Doomsday Super MIRV , and it is possible to stay far away from it before it fires, then the Doomsday Super MIRV is trivial and can be eliminated from this list.
- If there is only ONE Doomsday Super MIRV
- T4 Pellet Spinners (Lane), (T3 Pellet Spinners (Lane / Spiral)), (T3)/T4 Dart Spinners, T4 Shuriken Spinners - We shall refer to them as High Priority Turrets. Note that T3 Pellet (Lane / Spiral) & Dart Spinners are sometimes not a huge issue, so re-class them into Spinners if needed.
- Doomsday Bombs

Note that:
- Other turrets not mentioned are disregarded because they are not important to our discussion.
- The reason why Speed Lasers are not considered High Priority Turrets is because if they appear as difficult-to-reach turrets, more often than not, you'll find a more threatening difficult to reach turret, or there's just simply not many other dangerous turrets / simply tracking & speed lasers around.
- Doomsday Lasers
 are not considered Urgent / High Priority Turrets because it's usually a better idea to eliminate other more dangerous difficult to reach turrets. As front turrets, they are usually not the end of the world.
 - Although Doomsday Bombs are usually not threatening for survival in the case of Rocs , in some cases, where the front exposed turrets are all very deadly, it could be a viable idea to destroy the Doomsday Bombs to completely avoid all of the front exposed turrets.
The first thing to decide is from where would you like to attack these Urgent & High Priority Turrets.
- We first need to understand what ship you are using.
- If your ship is able to stun turrets, then the decision is automatically to attack these Urgent & High Priority Turrets from upfield.
- Start from downfield if there is time, quickly deploy it from downfield before heading upfield so you can collect the particles for additional stunning.
- If there is not enough time, then stay upfield and deploy the stun(s).
- The first exception is Nimbus, because it's main weapon cannot trigger when it is too near an Urgent & High Priority Turret, so Nimbus has no choice but to attack from downfield.
- The second exception is when the Roc or Condor is shielded
 .
.- In this case, attack from downfield, and wait for the shield to be downed before re-stunning the Roc or Condor and attacking the Urgent & High Priority Turrets from upfield.
The next point is based on how you want the long battle with the Roc or Condor to play out.
- If staying below is too dangerous due to the presence of many dangerous Slow Trackers or dangerous Forward Turrets, then it might be a good idea to attack the Urgent & High Priority Turrets from upfield.
- However, if such a case occurs, you have to understand that this might make the next wave (if there is, if not, ignore this) harder since you have to stay upfield in the next wave.
- Otherwise, heading back downfield might get you into a lot of trouble (especially if you are dealing with MIRVs or shurikens).
- If you lack a means to stun turrets, then you have to start attacking the Roc or Condor from upfield.
- If you have defensive means to get out of being cornered (namely, Bullet EMP , Point Defence , Chrono Field , Phalanx , Teleport & Reflex EMP
 ), starting from downfield would be a lot better, and a lot easier.
- For Barrier & Personal Shield
 ships, this would depend on your ability.
 - For Vorpal Lance & Mega Laser ships, while bullet clear is possible, it's not reliable enough to get you out of being cornered.
- For Barrier
At this point, there are 2 ways you will start attacking the Roc ![]() or Condor
or Condor ![]() : Upfield or Downfield. If you are attacking from downfield, proceed straight to Phase 3. We will focus more on upfield since that is a more dangerous situation.
: Upfield or Downfield. If you are attacking from downfield, proceed straight to Phase 3. We will focus more on upfield since that is a more dangerous situation.
Phase 1: Attack Urgent Priority Turrets from Upfield. Skip if there are no Urgent Priority Turrets.
Now, if we are starting from upfield, we need to look out for the Fast Trackers.
- Not destroying these Fast Trackers allows them to shoot us at point blank range, which will spell death.
- Thus, there is a need to stun these Fast Trackers first.
- Otherwise, you will have to find a way to block these Fast Trackers from shooting at you such as deploying a very well positioned barrier.
- You can also find extreme means to bypass these Fast Trackers.
- Such means include Mega Laser (Mega Laser Double Shot works really well here), Missile Swarm , Vorpal Lances & Focus Lance .
- You will need a LOT of skill to pull off Mega Laser & Focus Lance , as the final deployment position of a Roc can vary slightly.
- Charge Mega Laser or Focus Lance just underneath the Urgent Priority Turret to immediately pop it off after the Condor or Roc fully arrives.
- Not being careful will either result in turret collision death or missing the Roc entirely.
- If you are using Vorpal Lance , don't hesitate to stockpile Vorpal Lances, and use 2 for each turret.
- Be careful of turret collision.
- The correct positioning will matter if you are using Missile Swarm , but turret collision and entirely missing will be much less of an issue.
- At worst, you will just miss destroying the turrets.
- Such means include Mega Laser
On the other hand, Slow Trackers won't have enough time to reach us.
- We would have popped off these Urgent & High Priority Turrets before they can turn towards us.
- Boomerangs which are Slow Trackers are trivial as well since while we are eliminating these Urgent & High Priority Turrets, boomerangs will simply fly around us.
Forward Turrets are another bunch of turrets that are irrelevant to us as well since they can't do anything to us while we are behind them.
- Just be careful not to stay too near to MIRV Launchers as the MIRVs emitted might explode.
Focus on popping off these Urgent Priority Turrets that fire and reload very quickly first to prevent them from ruining our strategy to eliminate all Urgent & High Priority Turrets.
- If it is not possible to eliminate the Urgent Priority Turrets before they fire, or if the Fast Trackers are already threatening us, retreat downfield once either of them start firing.
- Unfortunately, this means we have to deal with the Slow Trackers and Forward Turrets. Skip to Phase 3.
Phase 2: Too dangerous downfield?
If you have eliminated all the Urgent Priority Turrets before they can fire, great job! Now, establish whether you want to play out the rest of the battle with the Condor ![]() or Roc
or Roc ![]() upfield or downfield.
upfield or downfield.
- This would depend on the Slow Trackers and Forward Turrets, whether or not they are dangerous or not.
- Remember that you might pay a price for staying upfield in the next wave as mentioned previously.
- If you are staying downfield, if there is enough time to pop off all the High Priority Turrets, do so and then head downfield. Proceed to Phase 3.
- If you are staying upfield, pop off all Doomsday Bombs first (if any).
- You may pop off some High Priority Turrets first if you are confident you can do so before the Doomsday Bomb(s) fire.
- Then, go ahead to pop off the High Priority Turrets.
- You don't have a choice if you stay upfield, you have to find a way to eliminate them all.
- As you pop off the High Priority Turrets, watch out for Spinners that can kill you if you are not careful.
After that, we have to deal with the dangerous Slow Trackers.
- For shuriken launchers & spreads, try to find a gap in their firing and then head downfield.
- This is because you will most likely get caught in the crossfire from both sides as you popped off the Urgent & High Priority Turrets previously.
- For tracking & speed lasers, find a chance to head downfield.
- If they are boomerangs , stay in the middle of the Condor or Roc .
- The boomerangs will most likely all swing around you.
- If you establish the fact that the other turrets are either all boomerangs , or the Forward Turrets are too trivial in that they won't cause a problem next wave, then you may stay in the middle the whole fight.
- Otherwise, head downfield where possible.
- The boomerangs
Phase 3: Attacking from downfield
If you are set on attacking from downfield from the start, pop off the Urgent Priority Turrets first, then the High Priority Turrets.
- Doomsday Bombs are completely trivial so just ignore them.
- Most Spinners are generally quite trivial from downfield so they can be popped off much later.
From here on, refer to the next section on the order of elimination.
Turret Popping Priority
The table below shows a general guide of what turrets you should pop off first. According to your Aura ![]() or Zen
or Zen ![]() , there will be some shuffling which will be detailed below this table.
, there will be some shuffling which will be detailed below this table.
If there are more than 2 turrets of the same type, then you might want to start looking for other dangerous turrets in Priorities P0 - P2 to pop off.
- This is because it would take too long to eliminate them all.
- One of the most important survival or speedrunning tactics is to always reduce the variety of turrets on field, so there is a more consistent strategy to survival or speedrunning.
| Priority P0 - Eliminate the most dangerous turrets on field. These are the following in order: |
|
| Priority P1 - Eliminate the more dangerous turrets. These are the following in order: |
|
| Priority P2 |
|
| Priority P3 | Go through the Priority List of P0 - P2 again, and eliminate all turrets if you skipped them previously because there were more than 2 of them. |
| Priority P4 | Eliminating turrets on one side of the field to allow breathing space on that side of the field, which makes the next wave easier. |
| Priority P5 |
|
| Priority P6: Reduce the variety of Invader weaponry in the wave. Or, reduce the variety of turrets (usually in terms of tiers) | The field gets messy pretty fast, especially in the higher ranks. Because different Invader weaponry behaves differently, and requires their own strategies, it is often near impossible to follow all the strategies for all Invader weaponry. Thus, look for turrets that are significantly fewer in number than the other turret types. For example, if there are only 2 T2 Boomerangs, compared to the dozens of different tiers of dart spreaders, eliminate the T2 Boomerangs Some turret tiers behave significantly different from others, especially Shuriken Wave Launchers, so do eliminate the higher tier turrets where possible if there are few enough. |
At this point, it matters less what turrets you eliminate. | Eliminate turrets that fire slower bullets, as slower bullets linger around the field for a much longer time. This means they can bleed into the next wave that comes with a fresh set of Invader weaponry. Combined with bullets from the last wave, it can spell trouble. |
Trivial Turrets |
|